If you haven’t noticed by now, we love using Bitmoji’s for pretty much anything and everything that we do. There are many creative ways to use Bitmoji’s in the classroom, from creating interactive Bitmoji classroom scenes to using Bitmoji’s with different check-ins. Bitmoji stickers are fun and easy to create, so stick around and we’ll show you how!
You can easily create Bitmoji stickers to use for feedback in your classroom using Google Drawings. Decide on the size of template you want to use (we suggest around the 3 x 3 inch or 300 x 300 px size), create a shape for the background of your sticker (i.e. a circle or square), and drag and drop your Bitmoji on top. To use your stickers, download as a PNG file and add them to student work.
We really love adding this personal touch to student feedback using personalized Bitmoji stickers! It’s a great way to establish your teacher presence and help build community within your class. If you want more great ways to build community, make sure you check out our 10 fun activities where we talk about Bitmoji stickers and more!
So let’s dive into the steps you need to take to create your own personalized Bitmoji stickers! Check out this video as well as the detailed instructions below to get started!
Getting Started with Bitmoji
First and foremost, if you haven’t created your Bitmoji yet, this is where you need to start! So you do need to download the app on your mobile device. The Bitmoji app is available for both iOS in the Apple App Store and Android in the Google Play Store.
Once you’ve downloaded the app, set up your account and follow the set up steps to create your Bitmoji. Have some fun with the process! There are so many options available in here so you can really customize the appearance of your Bitmoji self.
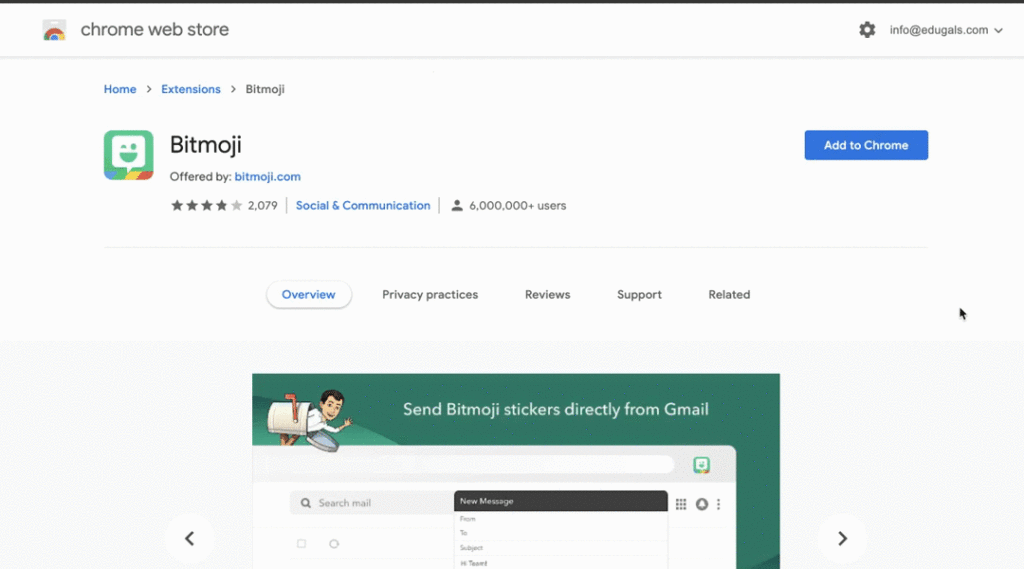
Add the Bitmoji Chrome Extension
You’ll also need to add the Bitmoji Chrome extension to make your sticker creation process easy! To get the Chrome extension, visit the Chrome store. From here, select the blue “Add to Chrome” button. You’ll then need to select “Add extension” and your extension should get installed. From there, log in to your Bitmoji account and you’ll have access to your Bitmoji’s right inside your Chrome browser!
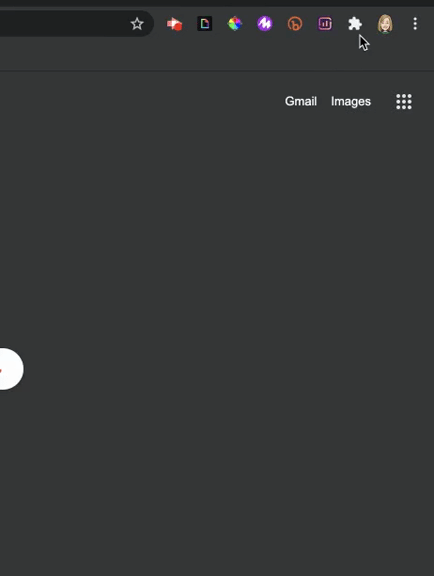
To access your Bitmoji’s in your Chrome extension, you first might need to pin it to your task bar. Click on the icon that looks like a puzzle piece, scroll down to find the Bitmoji extension, and make sure you click on the pin beside it to pin it to your task bar!
Steps to Creating Your Bitmoji Stickers in Google Drawings
Alright, now the fun can begin! Once you’ve got your Bitmoji extension all set up and ready to go, you are ready to begin crafting your personalized Bitmoji stickers. Let’s dive into the easy steps you need to take to create them.
1. Create a new Google Drawing
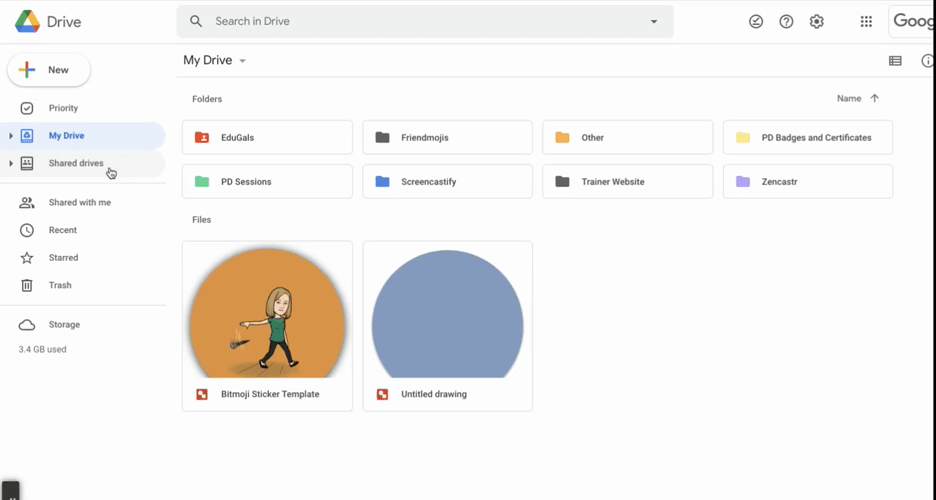
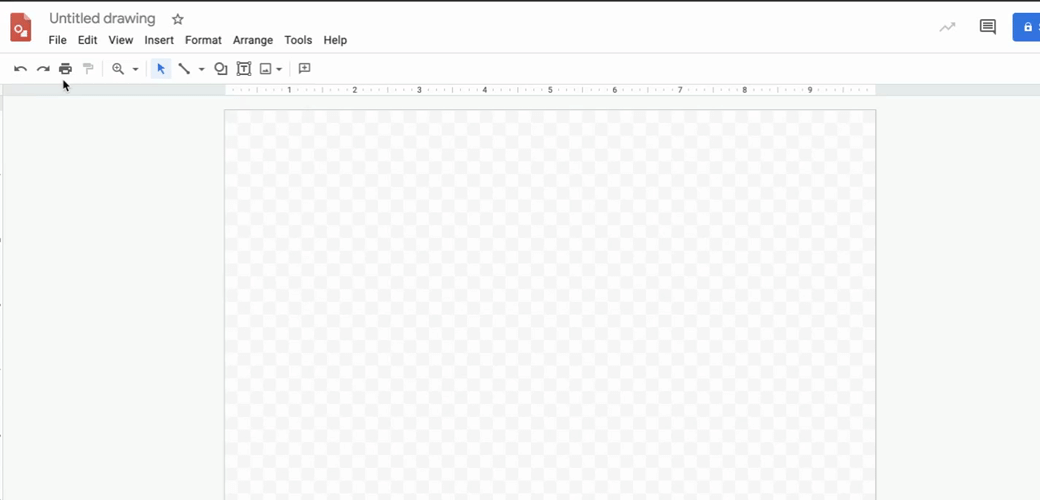
First, you’ll need to create a new Google Drawing. We really like using Google Drawings to make our Bitmoji stickers because it is really easy to work with and quick to generate multiple different stickers from a single template.
To start a new drawing, you can click on “New” in your Google Drive. Then scroll down and select “More“, then finally select “Google Drawings“. Alternatively, you can also just type in drawing.new or drawings.new into your Chrome address bar and it will magically start a new Google Drawings for you! We love, love, love this shortcut although beware… using it too often can quickly turn your Google Drive into a hot mess of unorganized chaos.
2. Name your new Google Drawing
Once you’ve got your new Drawing opened up, give the file a name by clicking in the top left box that says “Untitled Drawing” and type in your desired name here.
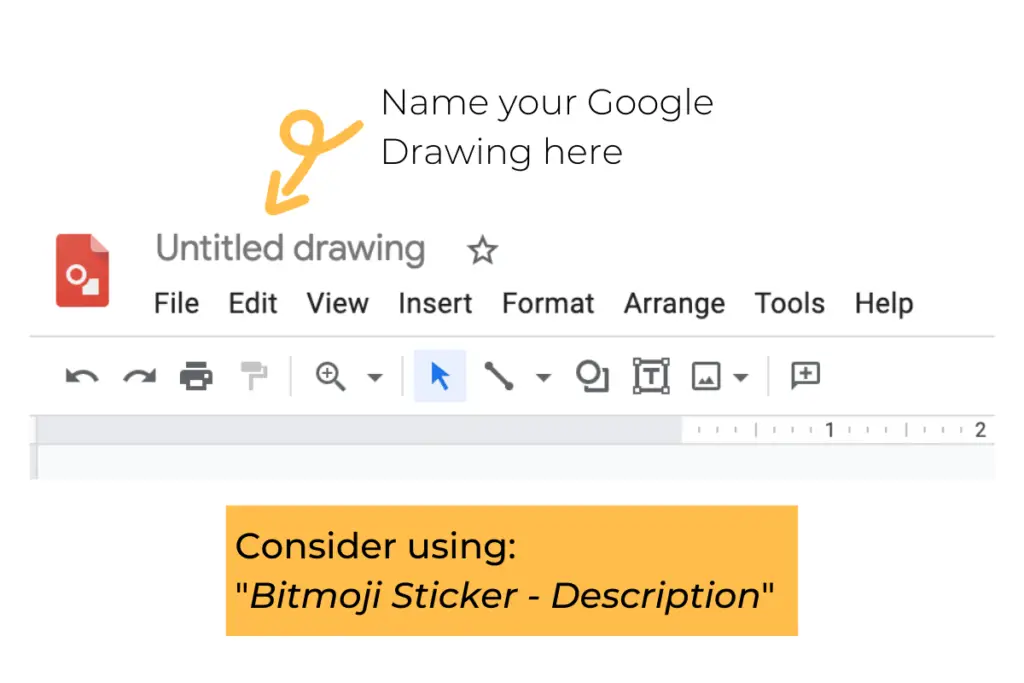
A pro tip that we have is to come up with a consistent naming system for your stickers… something like “Bitmoji Sticker – Description” where the description is a simple one or two words to describe what the sticker image represents. It might be also worthwhile creating a dedicated folder in your Google Drive to organize all of the amazing stickers that you will create.
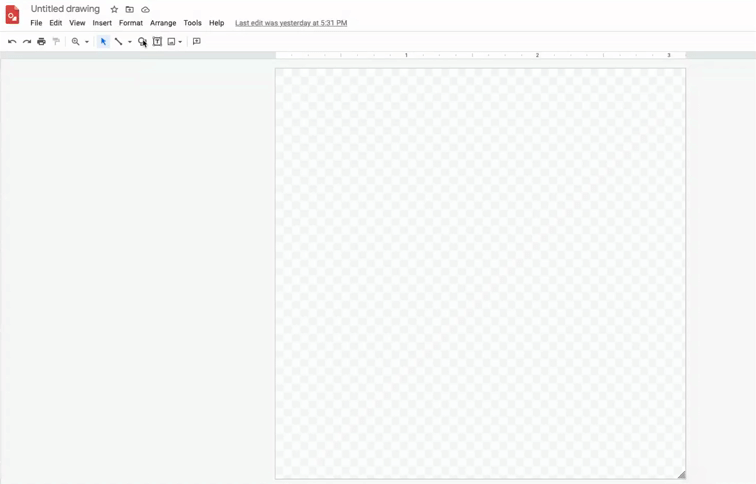
3. Change the dimensions of your Google Drawing canvas
Initially, a Google Drawing defaults to a standard 4:3 size. What this means is that your drawing space is initially set to 10 x 7.5 inch or 960 x 720 px. This is WAY too big for a sticker! So you’ll need to change your canvas size to work for creating the perfectly sized Bitmoji stickers.
To change the size of your canvas, navigate to “File” then “Page Setup“. From here, you’ll see the standard 4:3 option is selected. Click on the dropdown menu and select “Custom“. In the custom menu, you can now change your canvas size to whatever dimensions you want. We’d suggest that you use around a 3 x 3 inch canvas. If you’d rather work in pixels, try out 300 x 300 or 400 x 400 px.
Now once you’ve resized your canvas, it won’t look like much has changed. That’s because Google Drawings automatically zooms in to fit your screen. If you want to get a better idea of the actual size of your sticker, go to your zoom tool dropdown menu and select 100%. This will give you a preview of the actual size your final sticker will be. Now this is way too tiny to work with so make sure you zoom back in using the same dropdown menu – we suggest using the fit option here.
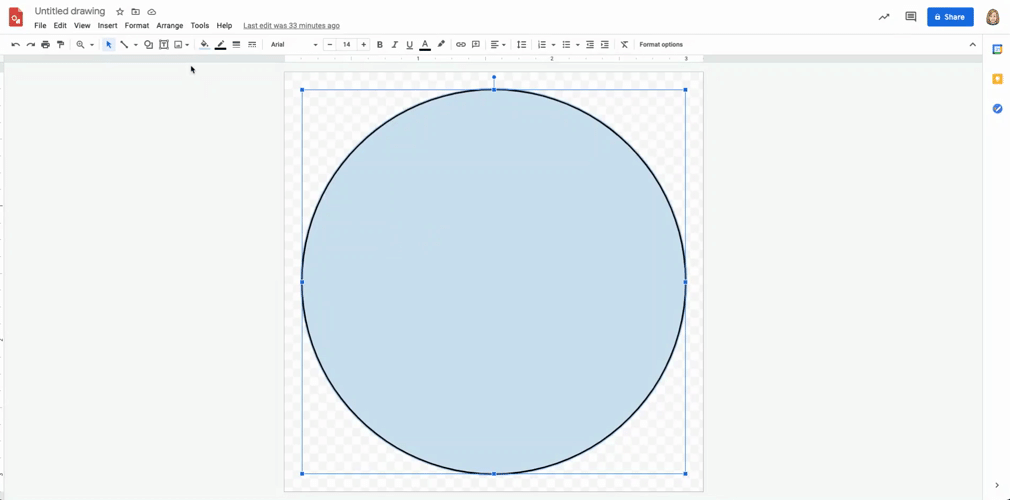
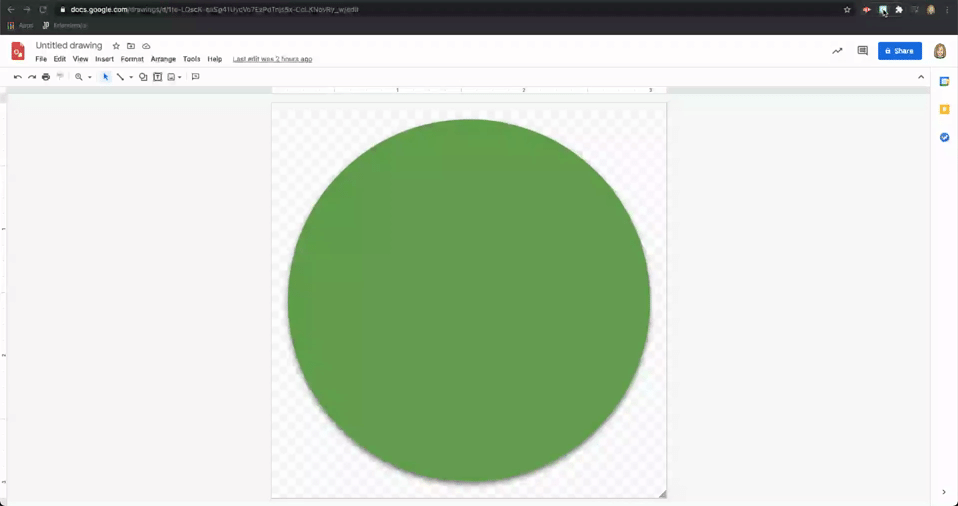
4. Add a new shape to your Drawing
Now onto the fun part! Let’s add a shape to your Drawing that will act as the background of your sticker. There are lots of great shapes to select from, but for your first sticker, we’d suggest that you stick with a simple circle shape for now. Once you’ve got the hang of this creation process, feel free to explore the other shapes available and mix it up!
There’s a couple of ways to add your shape to your drawing. You can use the “Insert” menu, then select “Shape” followed by “Shapes”. The circle is the first one on the second row. Alternatively, you can select the Shapes tool right from the toolbar which saves you a couple of steps.
Once you’ve selected your circle shape, you need to pick a starting point on your canvas and drag it until you’ve reached your desired size. We’d suggest that you start from the top left corner and drag down towards the bottom right corner to maximize the size. A pro tip is to hold down the “Shift” key as you are dragging out your shape because it will ensure that you create a perfect circle.
5. Formatting your Bitmoji sticker background shape
Now it’s time to make your circle look a bit more like a realistic sticker. Click on your circle and go to the “Fill Color” tool and change it to your desired colour. Google Drawings has a whole bunch of preset colours but you can also choose a custom colour if you know what specific colour you are looking for. You can also use a gradient which adds some nice dimension to your sticker. Have some fun at this point!
A pro tip that we have for selecting colours is to either use a website like Material Design Colors or if you are trying to match a specific colour, grab the hex code using the ColorPick Eyedropper Chrome extension. We really like the second option because you can grab a colour from within your Bitmoji and match it! This helps to really create a cohesive looking sticker.
Once you’ve got your background colour done, we’d also suggest that you get rid of the outline around the circle by clicking on the “Border Color” tool and selecting “Transparent”.
Finally, add a bit of dimension to your Bitmoji stickers by adding a drop shadow. You can do this in the “Format Options” menu and checking off the “Drop Shadow” option. Feel free to play a bit with the settings in the dropdown menu area here as well to customize the look and feel of your drop shadow.
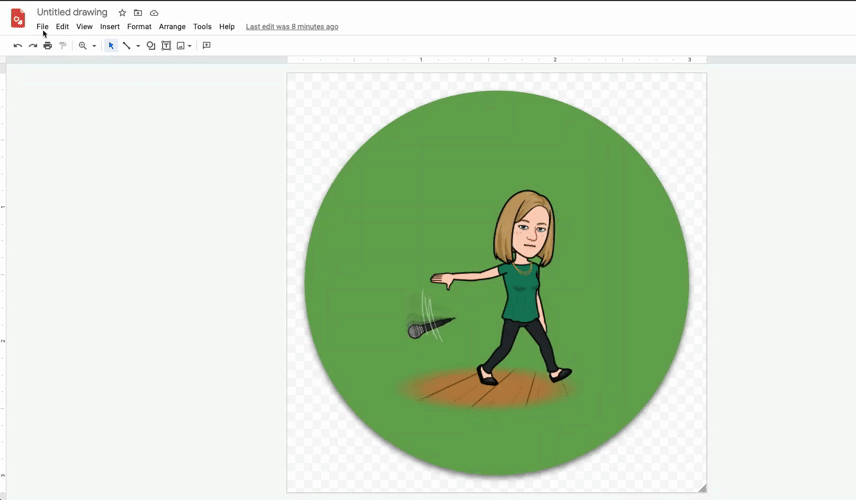
6. Search in your Bitmoji Chrome extension
Next, you can go to your Bitmoji Chrome extension and search for the perfect Bitmoji to add to your sticker! Click on the Bitmoji Chrome extension and enter a keyword into the search toolbar. From there, it’s just a matter of selecting the Bitmoji that you want to use.
Once you’ve found the perfect one, you can simply drag and drop your Bitmoji onto your Google Drawing. It will bring in a fairly large image so you’ll need to adjust the size by grabbing one of the corners and shrinking it down. You’ll also need to centre it on your sticker design so drag it to the middle of your canvas until you see both red lines appear. These guides are great because they tell you when you’ve reached the centre of your design!
7. Download your Bitmoji sticker as a PNG file
You are almost done at this point! Now you just need to download your new Bitmoji stickers to begin using them. We’d suggest that you download your sticker as a PNG file because that way, you’ll have a transparent background.
To do this, click on “File”, then navigate to “Download” and select “PNG Image (.png)”. This will start the download to your computer. From there, you can organize your stickers by creating a folder on your desktop OR you can upload them all to your Google Drive and organize them within there. We really like the desktop option because it makes it super easy to add your Bitmoji stickers to student work.
8. Add your new Bitmoji stickers to student work
Adding your Bitmoji stickers to student work works best in Google Workspace applications. We love having students complete assignments in projects in Google Slides, and Bitmoji stickers work easily and seamlessly with this app.
When you have student work open, for example in Google Slides, it is simply a matter of dragging and dropping your Bitmoji stickers into the doc itself. You can move the sticker wherever works best and since you downloaded it as a PNG image, you don’t have to worry about any sort of background.
Now if you want to level things up a bit, our suggestion is to add a comment to go along with your sticker. Simply right click on the sticker and select “Comment” (or try out the cmd/ctrl + option/alt + M keyboard shortcut). From here, you can type in your comments. Alternatively, you can add audio to your comment using the Mote extension or add video using Screencastify. If you choose to add Screencastify, you will need to record your screencast first and then add the sharing link to your comment within the student work.
Now Use Your First Bitmoji Sticker as a Template to Generate Many More!
Now that you’ve created your first sticker, it’s super easy to generate lots more. Just make a copy of your first sticker by going to “File” then “Make a Copy“, and simply adjust the colours and Bitmoji for your new sticker. Keep repeating the process every time you want to generate a new one, and before you know it, you’ll have an amazing collection of stickers that you can use for a personalized touch with student feedback.

We’d love to see your sticker creations! Share them with us on social media and make sure you tag us and include the #EduGals hashtag too! Happy creating!