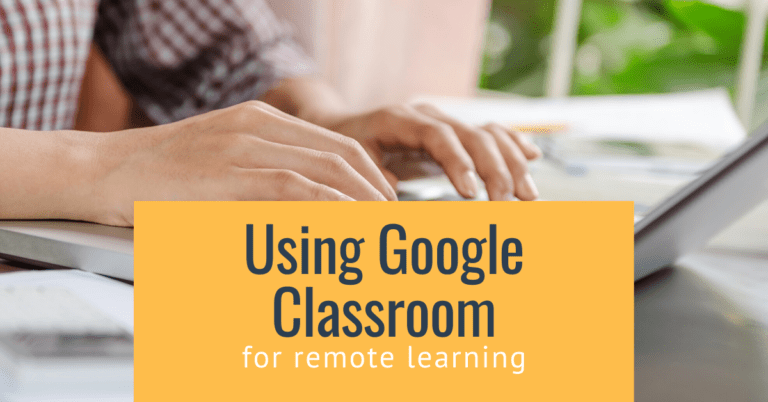
Have you always wanted to set up Google Sites for your classroom or extracurricular activity, but not sure where to start? As educators, we love using Google Sites because it is easy to set up and use with students!
Google Sites is a valuable website building tool for educators to use with classes or clubs. There are many different features, templates and options available to use when building a website, such as embedding Google docs, images, calendars, and more.
Google Sites is a very valuable tool for this coming school year, student portfolios, etc. As such, we felt it was worth doing a walk-through of the features and how to set it up and use it with your class. Read on to learn more or listen to our full conversation in the podcast episode below!
How to access Google Sites
There are 3 key ways that you can access Google Sites – note that all of these methods will land you in the exact same spot!
- Apps Waffle
- sites.google.com
- sites.new
The Google Sites Template Gallery
When you first arrive at the Sites homepage, there is an option to click on the templates gallery. You can then see a variety of options. This is such a great way to save time. There are many different templates available. There are education-based templates, as well as templates for a variety of other uses.
These templates have all of the navigation set up already, so it will certainly save time where you no longer have to map it out and ensure you set up the navigation properly. Google is good for that!
Explore the different options, as each template is easy to customize!
How To Edit Your Google Site
Don’t forget: Collaboration is key to the G Suite, and Google Sites is no different. Click on the share symbol at the top right of the screen, and get collaborating!
Similar to sharing settings in the rest of the G Suite, you can share a draft with people in your organization, anyone with the link can view or edit, etc.
Google Sites does not automatically publish. You have to purposefully publish it in order for anyone to be able to view or see it. Any changes made after you have published, do not publish automatically. You have to hit the publish button again to push those changes through to become live.
The Settings Cogwheel in Google Sites

The navigation bar takes people to different pages within your site. In the navigation settings on sites, there are options to have the navigation bar along the top or the side of your site.
You can also choose to have the navigation bar be transparent, white or black.
Adding Brand Images To Google Sites

In this section of the Sites settings, you are able to add a logo. It will apply that logo to your site and navigation bar. You can also upload or choose a favicon image for your site. This symbol will appear in your Chrome tab. And the great part is that you can customize and add your own image.
Viewer Tools
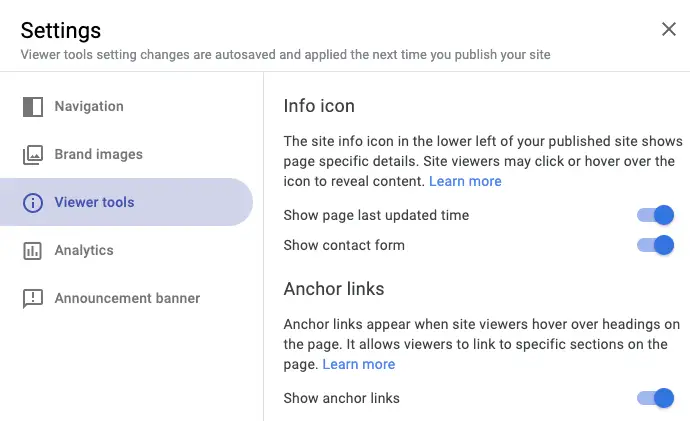
In this section of the settings, you can select whether or not to include that last time your page has been updated, and where to show the contact form or not. You can also choose whether to show anchor links or not (those links that appear when you hover over headings on a page).
You Can Use Analytics in Google Sites!

In order to enable analytics, you need a separate account. To sign up, go to analytics.google.com. Once you have created your account, you are then given a tracking id. Type this tracking id into the Analytics settings, and you can get started! Analytics is a very powerful tool, and allows you to track traffic that your website is getting.
Adding An Announcement Banner To Your Site

The announcement banner can be displayed above the navigation bar. You can customize the text, and the colour of the banner. The announcement banner can be turned on, and then turned off when done. This feature is great for reminders or news that you want your viewers to see.
You can also choose to add a button that can be linked to another site.
Tools & Elements in Google Sites
There are a host of options in terms of tools and elements that you can add to your Google Site. There are so many choices, which make it easy to incorporate a variety of elements to your site.
Insert Panel

When adding to your site, Google has anything and everything you can think of! There are even more options for layouts now, which make it easy to get started.
As you are building your site, be sure to add images throughout. The more visual engaging your site, the easier it is for students (or viewers) to engage.
The first step to consider is which layout you want for your page. Click on a layout and it will automatically pop it in. It puts in placeholders for images, etc. so all you have to do is choose your image, and put it in that placeholder. If you decide you don’t want an image (or any feature in a layout), you can actually opt to put in a calendar, YouTube video, map, or whatever it is you would prefer. You aren’t limited to the default.
Layout templates are a good starting place. Choose one that is close to what you want and change/customize from there. The great thing about Google is that you aren’t limited to what they have set out, you can choose what you think will work, and tweak it to fit your purpose and vision.
Another neat feature is that you can double click anywhere on the site. A wheel will come up on your page. This wheel gives options to insert or embed various elements. It’s a handy feature to use.

A feature that we really enjoy is the image carousel. It’s a great way to showcase learning and/or extracurriculars on your site.
One of our favourite features on Sites is the collapsible text feature. It is a great way to hide text so that it doesn’t take away from the visual appeal of the page, and then you can easily expand to see the text.
One note of warning: If you insert anything from your Google Drive, you need to make sure that you go back to your Drive and change your sharing settings. It doesn’t automatically change the settings so that students or viewers can view the items.
If it helps, save yourself some time and move any docs/slides, etc. that you are using on your Site to one folder. Change the sharing privileges of that folder and it will impact everything inside that folder – sharing done!
Pages
In this area, you can add more pages to your site, and you can also add a link that will take your students or viewers to an external website. If you choose a page, you then have created another page for you to create and design.
When you are naming your page, make sure it makes sense to the users that will see the name. You can also have subpages. If you have created a bunch of pages and want to reorganize into pages and subpages, you can then drag and drop them to where you want them. If you have subpages, Sites will then create drop downs within the navigation bar.
Themes

There are a few different options for themes, and within that a few different fonts per theme.
Try out a variety of different themes and fonts, and see which suits your style best. You can also choose an accent colour, which can be customized.
The nice thing is that it is easy to toggle between the various themes, colours and fonts, so you can really get a sense for what it will look like, and what does and does not work.
Preview
Prior to hitting the publish button, don’t forget to check out what your site will look like for your students. There are options to see what it will look like on a computer, a tablet and a cell phone. This will allow you to really understand what your students see from their devices.
Publishing Your Google Site
When you first click, you will first have to choose your website address. You will then have the choice to manage who will be able to view your site. If you click on the manage button, it will take you to the sharing setting, and then you can choose who can see the site.
Once you have published, you will then see a drop down beside the publish button. You will then find a variety of options. If you make changes to your site, none of the changes will be made until you “publish” again. You also have the option to unpublish your site, so that it is no longer live.
Practical Uses of Google Sites
With a strange school year underway, there are many great uses for Google Sites. Some examples are:
- Extracurriculars
- Course Websites
- Google Library
- Student-driven collaboration – discussion boards
- create a class wiki that builds content as they are learning in the course
- Blog for students to use to reflect on their learning
- Student Portfolio – we wrote a whole post dedicated to how to use portfolios in the classroom so be sure to check it out!
- Group Projects – collaborative space
- Interactive Notebook (Each student has their own site)
- Organize course materials on a site instead of Google Classroom
Google Sites is great for these activities because you can protect student data and privacy through the share settings.