Screencastify is an amazing screen capturing extension for Google Chrome. You can use it in so many amazing ways in the classroom, from recording lessons to having your students be creators.
I use Screencastify in so many ways in my classroom. What I really love about Screencastify is how easy it is to get started and use it. I just quickly open up a new tab, click on the extension, and away I go!
Screencastify includes all these wonderful keyboard shortcuts (and I love keyboard shortcuts!) that can help you save valuable hours of your precious time. You can take it a step further by customizing your keyboard shortcuts using the options menu in Screencastify to really maximize your productivity!
What is Screencastify?
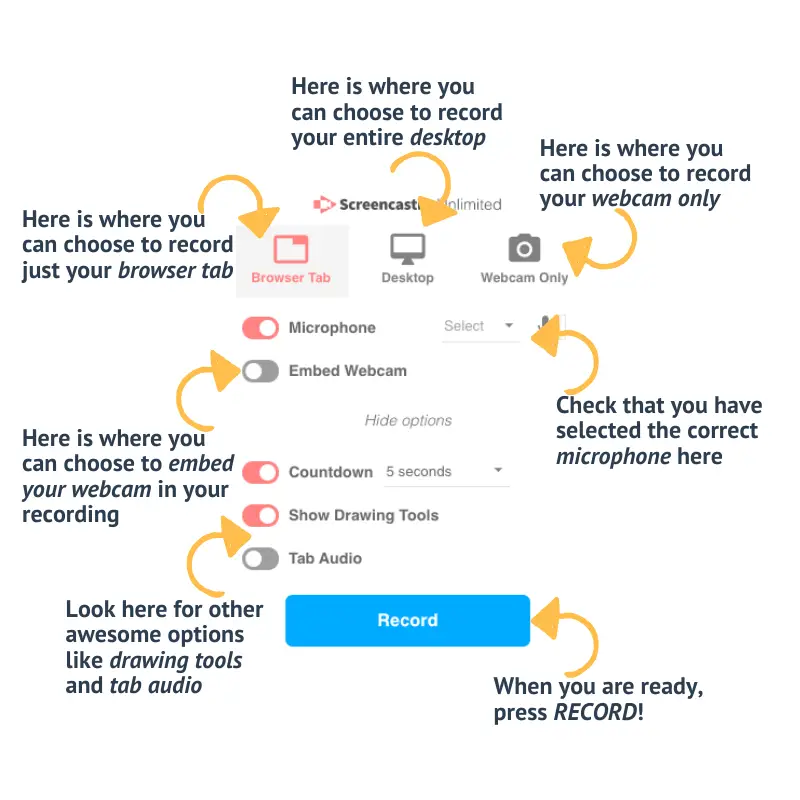
So you first might be asking, what is Screencastify anyway? In a nutshell, it is a free Google Chrome extension that allows you to record your screen.
Sounds pretty simple right?
It is simple and easy to use. I find that it is super intuitive and it took me no time at all to figure out the basics. Except for how to trim videos… I had to look that one up!
How to Get Screencastify
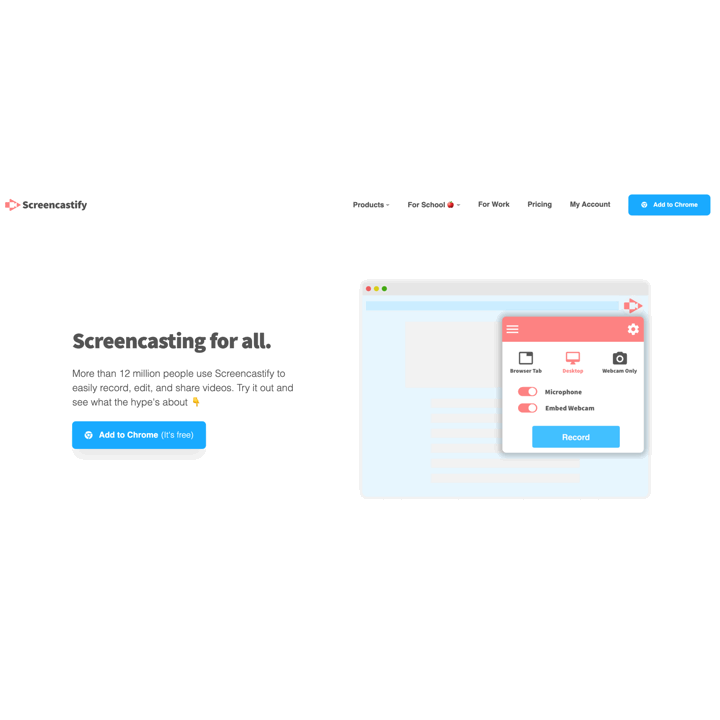
The #1 absolute easiest way to get Screencastify is to visit their website: www.screencastify.com. From there, you click on Add To Chrome (you’ll find this in the top right hand corner of the page).
This will take you to the Chrome Web Store where you can add the extension. Click on the Add to Chrome, then click on Add Extension. Easy peasy!
Once it’s added to your Chrome, you can click on the Icon and follow the initial setup steps.
Keyboard Shortcuts In Screencastify
Okay, so now that you’ve got Screencastify all setup, where do you find the keyboard shortcuts? And more importantly, why should you even bother?
Keyboard shortcuts are AMAZING! I find that my productivity goes up and my time spent on a task drastically goes down when I take the time to learn and use keyboard shortcuts. It might only save you a few seconds here or there if you compare it to navigating your mouse and clicking. But over time, those seconds of navigating and clicking really do add up!So what are the keyboard shortcuts for Screencastify? You will find a complete list of keyboard shortcuts in this handy article from Screencastify.
There are shortcuts for both recording as well as the drawing tools. Unfortunately, only the recording shortcuts can be customized. So you’ll need to remember the drawing tool shortcuts if you want to make use of them.
Our suggestion: print out the list of keyboard shortcuts and tape them up nearby when you are recording. That way, if you forget what one is, you can easily look it up!
How Can I Customize My Keyboard Shortcuts?
I have a pretty good memory and I’m able to memorize a lot of really random pieces of information. So I find memorizing keyboard shortcuts fairly easy.
However, I know this can be challenging for some. Especially when there are 2-3 buttons that you need to press simultaneously!
So… why not change those keyboard shortcuts to something easier to remember? Something that is customized and makes sense to you?
Unfortunately, you are only able to customize the recording shortcuts in Screencastify. The drawing tools shortcuts are not customizable. The upside though is that once you’ve changed the recording shortcuts, you’ll have keyboard shortcuts that are unique for you and a little bit easier to remember.
Changing your keyboard shortcuts in Screencastify is simple and only takes a few steps. To get to the keyboard shortcuts in Screencastify, simply follow these steps:
Step 1
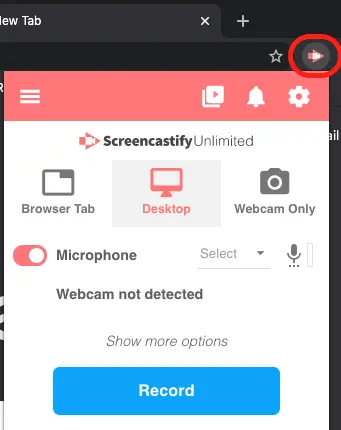
The first thing that you need to do is open your Screencastify extension in Chrome. To do that, click on the icon that shows up in your toolbar just to the right of the omni box.
Step 2
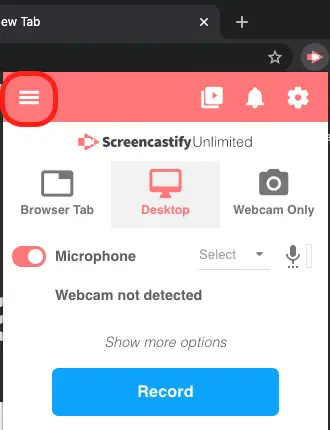
Click on the three lines (or I like to think of them as the three pancakes) in the top left corner of the application window. This is going to give you a bunch of other options to choose from.
Step 3
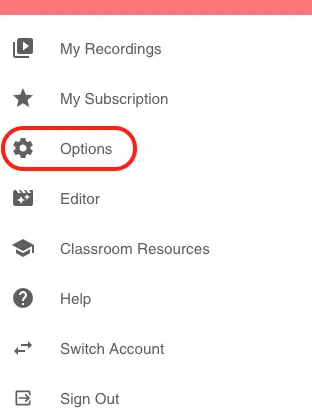
Click on Options. It should be the third item from the top of the list. It also has a little cog wheel as an icon to help you find it a bit easier!
Step 4
Scroll down until you see Keyboard Shortcuts (third from the top). At this point, there are two options that you can click on: configure recording shortcuts and view drawing tools shortcuts.
Click on the configure recording shortcuts to get to the menu to change your shortcuts.
Step 5
This opens up the customizer for all of your Chrome extensions. Here, you can not only change the keyboard shortcuts for Screencastify, but you can also change them for any other extension that you have installed!
Find the Screencastify extension and go ahead and change your shortcuts.
Recording Shortcut Options
There are only four keyboard shortcuts that you can customize in the settings:

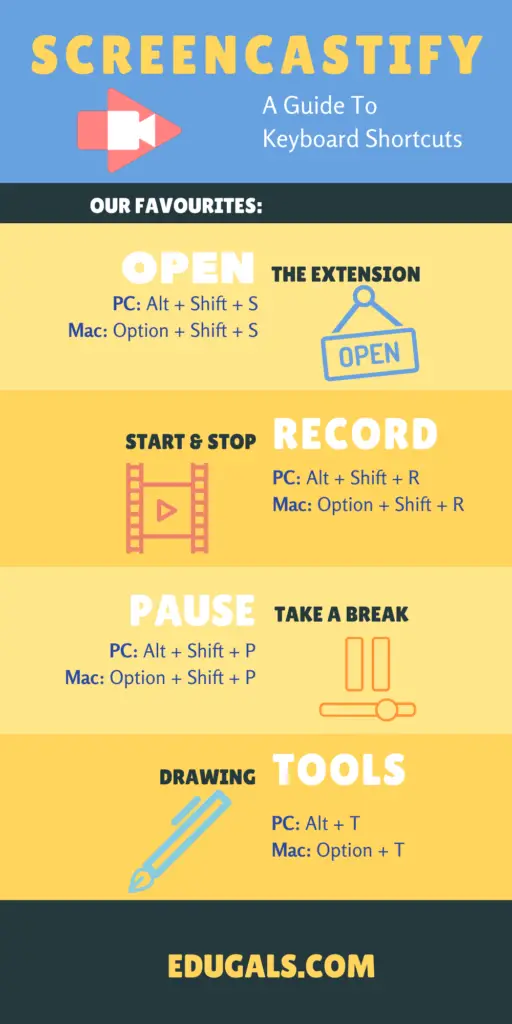
Activate the extension
This shortcut opens up the Screencastify extension so that you don’t need to click on it in your toolbar beside the omni box. It’s default setting is Alt + Shift + S on a PC or Option + Shift + S on a Mac.
Change recording focus to current tab
I’ll be honest… I have no idea what this shortcut is and what it does. I tried it out but it doesn’t appear to do anything in terms of recording settings? But it’s default setting is Alt + Shift + F on a PC or Option + Shift + F on Mac. If you know what this shortcut does, leave us a comment below!
Pause/resume recording
Need to take a quick break in the middle of recording? Forgot what to say and need to check your notes? If so, this shortcut allows you to quickly pause and resume your recording. It’s default setting is Alt + Shift + P on a PC or Option + Shift + P on a Mac.
Start/stop recording
I use this shortcut the most! It allows you to start and stop your recording so that you don’t need to do it within the extension window. It’s default setting is Alt + Shift + R on a PC or Option + Shift + R on a Mac.
What Do You Change Your Shortcuts To?
First and foremost, pick something that makes sense to you! What are you going to remember the easiest? I’d suggest changing them to something that only requires you to use 1 or 2 keys maximum instead of the 3 that it is currently set for.
Second, you will want to consider what other shortcuts are used by any other extension that you have installed in Chrome.
It’s a good idea to take a look through the keyboard shortcuts for your other extensions in the Chrome extension customizer that you opened in step 5. If you aren’t careful here, you could have other extensions opening and doing all kinds of funny business while you are trying to record in Screencastify.
Third, you also need to pay attention to what the shortcuts are for the drawing tools. Since you cannot customize these shortcuts, you’ll need to make sure you don’t pick the same ones for your recording shortcuts.
Finally, I’d highly recommend sticking with letters that begin with the task that you are trying to do. For example, use R to start and stop recording, P for pause, and maybe even O to open the extension.
Ready To Learn More?
Screencastify truly is an amazing little Chrome extension that can do so much. And it is so useful for teachers, especially if you are doing flipped classroom, blended learning, or fully online learning.
There are some really great resources and professional development courses with Screencastify. Here are some further links that you can explore:
- https://www.screencastify.com/education – Teacher Resources
- https://www.screencastify.com/courses – Professional Development Courses
We also dedicated an entire podcast episode to Remote Learning With Screencastify. Be sure to check it out!
So we are curious, have you customized your Screencastify shortcuts? If so, what did you choose? Leave us a comment below!