Google Keep is such an amazing tool for organization and quick note taking. And we love creating and using custom Google Keep headers to take our organization to the next level (and, frankly, just to make it look pretty too!). We are big fans of Google Keep and use it daily to create our to-do lists, which really helps us stay on task and organized.
We also use it for jotting down ideas we have – for example, blog post, video, or podcast episode ideas, and we can even collaborate on those lists together. It’s also great to keep track of grading tasks to complete, or lesson planning ideas. Really… the ideas and ways to use Google Keep are endless!
To create visually stunning and well organized notes, Google Keep headers can be added to any note as an image file. Google Slides or Google Drawings are two great tools that you can use to create your custom Google Keep headers, although you can use other tools such as Canva.
To create your custom Google Keep headers, start by creating a new slides/drawings doc, change the dimensions of the page layout, add your text and images, download as a PNG file, then upload into Google Keep. You can also add GIFs as Google Keep headers – so keep reading, and we’ll show you how to do this quickly and efficiently!
Steps to Creating Your Custom Google Keep Headers
Let’s start out by going over the basics of how to create your own simple, yet fun and custom Google Keep headers with these 6 easy steps!
1. Create a new Google Slides presentation (or a new Google Drawing)
So it really doesn’t matter which platform you choose (Google Slides OR Google Drawings) to begin designing your custom Google Keep headers. Although we would suggest that you use Google Slides if you want to create multiple headers in a single file and Google Drawings if you want to create a single file that you can make copies of if you want to create different iterations of your headers. The functionality is essentially the same in both tools though, so just pick one and get started.
One trick that we really appreciate is to use the new URLs from Google to create a new Slides or Drawings doc. Try out slides.new to create a new Google Slides presentation or drawings.new to create a new Google Drawings document. Alternatively, you can go through your Google Drive and select the “New” button, followed by either Slides or Drawings (FYI you’ll find Drawings under the “More” options).
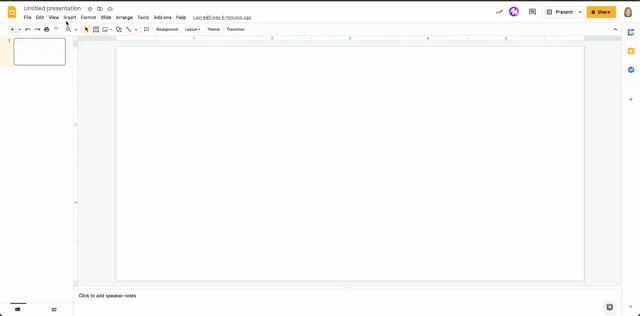
2. Change your page dimensions (optional)
This is not totally necessary but we like to design headers that are a bit shorter than the typical slide/drawing height. You can add Google Keep headers that are any dimensions – we think it depends on the look that you are going for which is why this step is optional.
If you do decided to change your page dimensions, navigate to “File” then go to “Page Setup“. From here, select the dropdown option and go to “Custom“, then enter in your preferred dimensions. We’ve had great success with choosing 6 x 3 inches but this is totally up to you and lots of different dimensions can work here. Once you are done, click on “Apply” to apply your new changes to your document.
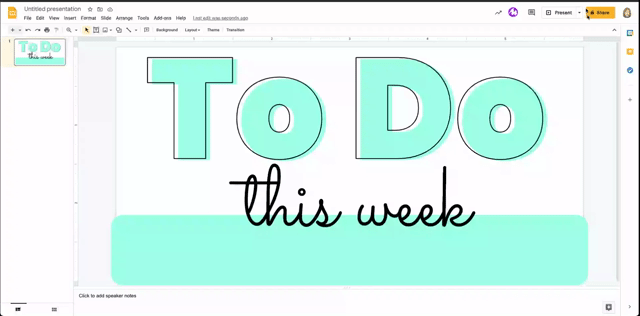
3. Add your text and/or word art for your Google Keep header titles
Now comes the fun and creative part! Add in your text for your Google Keep header into your design. We’d suggest that you make your text nice and big so that it’s easy to see once your image is added to a Google Keep note.
If you’ve used our suggested slide/drawing dimensions above (6 x 3 inches), then you’ll want to select a font size around 80 pt or even larger. This depends a bit on the actual font that you choose since all fonts are slightly differently sized depending on a number of other factors. Play around with it on your page layout and try to make the font take up the majority of the width of your page.
You might also consider using word art here to add a bit more to your design. To add word art, click on “Insert” then select “Word Art”. From there, you simply type in your word(s) and use the various formatting tools to change it’s appearance.
Now if you’d like to match any of the text or word art to the colours available in Google Keep, here are all the hex codes that you will need. Simply add a custom colour and paste in this hex code to match it perfectly.
| Google Keep Colour | HEX Code |
|---|---|
| Red | #F28B82 |
| Orange | #FBBC05 |
| Yellow | #FFF475 |
| Green | #CCFF90 |
| Teal | #A7FFEB |
| Blue | #CBF0F8 |
| Dark Blue | #AECBFA |
| Purple | #D7AEFB |
| Pink | #FDCFE8 |
| Brown | #E6C9A8 |
| Gray | #E8EAED |
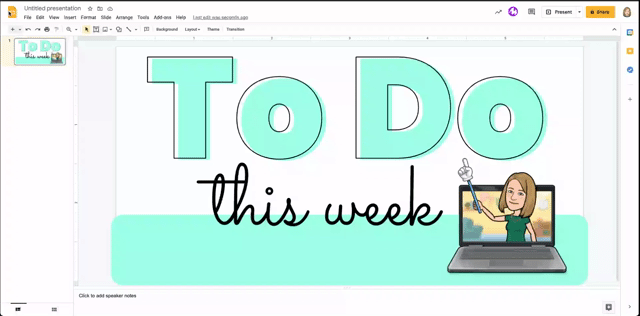
4. Add icons and/or other images as visual cues for your notes
A picture really is worth a thousand words. We suggest that you consider adding icons, visuals, or even your bitmoji to your Google Keep headers. Pairing text with images is great for association with the brain and it gives you a quick way to find the right note that you are looking for.
If you are adding images, look for those that have a transparent background (typically these are PNG file types). Some other tools that we might recommend here are Google slides add ons like Insert Icons for Slides or the new IconsMania website from SlidesMania creator. Google also has their own icons on their Google Fonts website.
5. Download your Google Keep Header as an image file
Now that you have finished with your creation, it’s time to download your image file. This process is the same for both Google Slides and Google Drawings. Our recommendation is to download it as a PNG file but JPG works as well.
To download your slide or drawing as an image, navigate to “File” then “Download” and select “PNG image (.png)”. This will download the image to your computer and you will use this image in Google Keep in the next step.
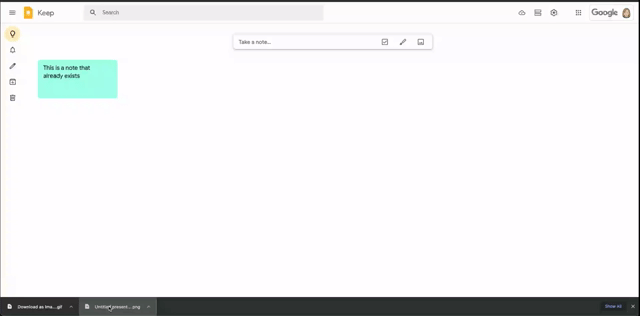
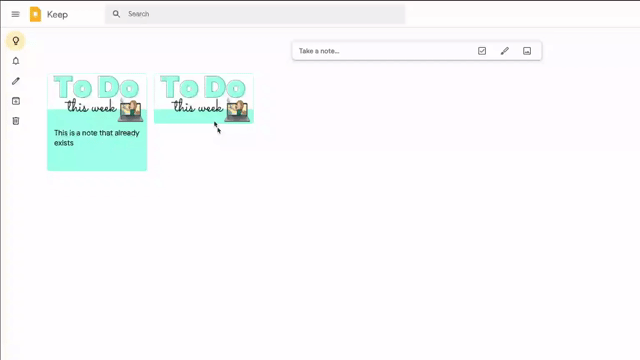
6. Add the image to a Google Keep note
The last step involves adding your image to a Google Keep note. There are a couple of ways to do this. First, you can simply drag and drop your image onto any note, whether it already exists or whether you are creating a new note. Alternatively, there is an “Add Image” button available on both existing and new notes. You can click on the “Add Image” icon, then navigate and select your image file from there. And that’s it… you’re done!
Bonus Tips to Take Your Google Keep Headers to the Next Level
1. Pinning Notes in Google Keep
Consider pinning your most important notes and lists to the top of your Google Keep window for easy access. We really love doing this since it also then puts these notes at the top of your list when accessing Google Keep from other apps like Calendar, Drive, and Gmail.
To pin a note in Google Keep, simply hover over the note and click on the small pushpin icon in the top right corner of your note. To unpin the note, click on the icon again.
2. Consider using Canva to design your Google Keep Headers
Canva is pretty awesome and we’ve talked about this tool in a few other places, like using it to create some amazing and custom Google Jamboard templates. We’ve also got a whole podcast episode dedicated to what you can do with Canva which you can listen to here or on your favourite podcasting app (such as Apple Podcasts, Google Podcasts, or Spotify).
You can get really super fancy with Canva in creating your custom Google Keep headers. Make sure that you are signed up for an EDU education account which gives you access to some great premium templates, fonts, and images. We won’t dive into specific details here on Canva, so be sure to check the links above if you need more information.
3. You can add GIFs to your Google Keep Headers
Want to add animation to your Google Keep headers and really take it up a notch? Google Keep also allows you to add GIFs so you can do a lot with animation here. We’d highly suggest that you use Canva to create your GIFs as there are a lot of great interactive stickers and videos that you can add in to really take your Google Keep headers to the next level. Play around here and have some fun with it!
Templates for Google Keep Headers
Are you low on time and energy right now? Here are a few resources that we think are helpful for you to use to get going right away so that you don’t have to start from scratch!
- Template from SlidesMania – we’ve used this one a lot and it’s super easy to use and customize.
- Our EduGals Template – here is a link to the Google Slides template that we used when creating our video, so feel free to take it and customize it for yourself.