[podcast_subscribe id=”7428″]
In this episode, we are talking all about digital organization for teachers. We are going to start with traditional planners and lesson plans, then give you some tips on how to organize your Gmail and Drive.
If you like what you hear, then share this episode with a colleague or friend, and make sure you subscribe so that you don’t miss out on any new content! If you are able, consider supporting the show by buying us a coffee!
We would love to hear from you – leave a comment here, OR check out our FLIPGRID!
Show Notes
This week, we are chatting about getting organized as a teacher. We will talk about Canva, Slidesmania as well as some Google Workspace tools.
It has been an interesting transition back to in-person learning for us, and our resources are quite crazy and scatter because of the constant changes between virtual and in-person, so we thought it would be a good time to talk about how we can get organized. Hopefully we can help you get on track for a successful school year!
Teacher Planners
There are so many different options out there for teacher planners. Some of us educators use them, whereas some don’t – and that’s okay! There are paper planners, calendars and digital planners as well.
For the digital planners, there are also some amazing (and sometimes beautiful) templates available for teachers to use! Some tools that have these templates are Canva and Slidesmania.
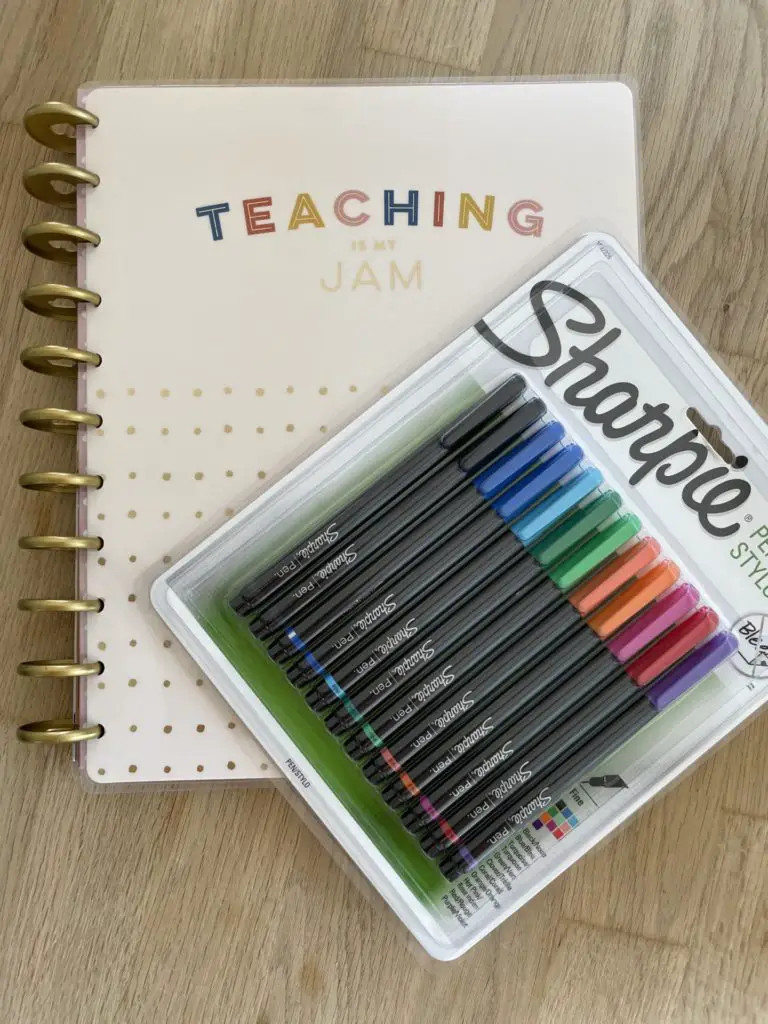
Katie uses a paper planner, known as the Happy Planner, which may seem strange in this digital age, but this is the way her brain works, so she goes with it! There are many options out there for planners – so it’s a matter of finding a format that works for you, or hacking the pre-made formats that are available.
And what is a new teacher planner without new coloured pens?! Not only are they the perfect pair, but they also help to build excitement for the new school year.
After the year and a half that we have had in education, any and all excitement that we can build for this school year is appreciated.
So, if you are a paper planner person, find one that works for you, and go with it! Places like Indigo, Costco, and Michaels (all of these are in Canada) are great places to look.
Using a paper planner doesn’t mean that you can’t or won’t use digital tools as well. Once you have written out your ideas/plans for your lessons, you can then use a digital tool to hyperlink and organize the resources you want to use.
Digital planning can be as simple as using Google Calendar. You can create a calendar for each course, put in all of the topics for each day, and then link in each of the lessons and/or handouts. This way students have access to
Canva
Canva has some amazing templates that you can use for planning. You can print them out and plan on paper, if that is what works best for you, or you can use them digitally to plan.
These Canva planners include planner templates (daily, weekly, monthly, etc.), lesson plan templates, as well as desktop wallpapers. There are some really great options – so go through and choose one that works best for you. There are options based on style, visual appeal, organization, etc. And even if it doesn’t fit your needs, you can tweak and change it to fit your purpose and style.
If there are time options, you could even customize your times based on class duration, etc. or you can change any of the text or images that are included. When you are done, you can then download it and print it, or download it as an image and use it digitally!
To be honest, you can even just work and plan within Canva – insert your links to activities, etc. and have an ongoing file that you are using to plan.
Sometimes having something that looks pretty makes it easier to want to use them.
Consider introducing your students to some of these options as well – it’s a great way to teach time management.
SlidesMania
SlidesMania is a free web-based resource that has so many different templates that you can use. There are so many different options for planners – yearly, weekly, notebook style, morning meeting layouts and more. You can choose one you like, and then personalize it to your needs. These templates make digital organization so much easier!
Once you are done, download it to PDF, and then open it on a tablet or ipad in an app such as Good Notes where you can write on it and take notes. Alternatively, keep it as a Slides and keep editing, adding in links, etc. as you go!
Stephanie Howell has a great idea where you can take a planner template and tweak it to your style, and then use it to organize all of your resources. It’s called the GRID method. She hosted a webinar all about this, so check it out here if you are interested in this method!
Using a Slide deck to organize your resources will also help you as an educator to figure out where everything is, and put it all in one place. After a year and a half of constant shifting from in-class to emergency remote learning, to hybrid learning, to then completely virtual learning, and now back to in-person, resources are everywhere! Katie tried to get organized and track what was being used, she created new folders, moved things around, etc. but after so much instability in education, her Google Drive is a disaster!
Using these digital planners will give you the opportunity to go through and organize your files and folders and to find your resources again.
Even using a Doc or Sheet with all of the lessons and resources hyperlinked, is a great way to keep your Google Classroom clean and organized, and it is much easier to find your materials. It also makes it super easy to collaborate with other teachers since everything is all in one place.
Notebook style templates are a great way to get organized with lesson planning. There are a bunch of tabs along the side that allows you to break it down by unit, week, etc. and hyperlink in resources from there.
Go to SlidesMania, find a template, and give it a try!
Google Calendar
Google Calendar is also a simple way to get yourself organized. Depending on your role, this may be the way to go. It’s an easy way to see upcoming meetings, but also a great way to try out ‘time blocking.’
Time blocking is where you create an event for a specific block of time, and you come up with an agenda or list of items that you have to complete within that time period. It’s best to take tasks that are similar to each other, and completing those tasks within that block of time.
For example, you could have a block of time just for communication. During this time you can catch up on emails and respond as needed, you can check group messages, and really just make sure you are caught up in terms of messaging.
You can use different colours for different tasks, and you can also use Google Tasks within that as well since it is integrated right in there. You can check them off as you go to keep yourself on track.
It may not work for all roles at all times, but it can certainly still work for most educators. Also, it is pretty easy to move things as needed, so if something comes up, you can drag and drop that to a new day and/or time.
Google Calendar can also be used to simply hyperlink in all of the lessons and resources you plan to use each day.
Google Keep
Google Keep is great for to-do lists, as well as regular checklists to remind you of everything you need to do to complete some sort of task. It really is a great tool for reminders, etc.
And be sure to check out our blog post all about how to create Google Keep headers to make this tool more visually appealing.
Gmail
This tool is an absolute monster, but it has so many different features that you can use to get yourself organized.
Filters are perhaps the best way to help get your organized! You can set it up so that certain emails or group emails get sent to specific labels. This way you can go and read them when you can, and they aren’t cluttering up your inbox. There’s nothing worse than checking your email and seeing 100 unread messages that aren’t high priority – filters can definitely help keep that under control.
Feel free to check out our YouTube video on how to set up filters in Gmail. We also dedicated an episode and a blog post to Gmail, so feel free to check those out as well.
One inbox option that may help you to stay organized is to use multiple inboxes. There are three labels: action, waiting, read. As you read an email, you label them based on those three categories, and then use it as your to-do list. Action are the items you have to take care of right away, Waiting means you are waiting on a response, and “Read” is something for you to go back and read later.
Another tip is that you can create multiple alias email addresses for yourself and it will send it to the appropriate label in your inbox. For example, if your gmail address is [email protected], you could respond and bcc it to [email protected]. Anytime any email goes through with that +waiting, it will go through to that waiting label. As long as you have a label with that name, it will go through to that label.
It’s a sure fire way of making sure you can keep tabs on messages you are waiting on.
Google Drive
One last area for digital organization that we want to talk about is the Google Drive. We have spoken about naming conventions, starred folders or docs, etc. but it’s worth going back to it again.
It’s especially important to talk about naming conventions because if you used those tips last year, you probably want to go back and rename/reorganize based on your current teaching assignment or situation.
For example, if you want a folder or file easily accessible to you, rename with “001” in front (followed by 002, 003, etc.). That way it will sort in your Drive with the numbered folders listed on top. It’s a great way to keep your current course folders on top.
Also – remember that if you starred folders last year, remove the star for this year if you don’t need them! The point of the starred folder is to keep the most important documents or folders easily accessible – you really don’t want much more than 10-15 items starred. So, remove those old stars if you haven’t yet!
Another area to check out is the priority tab. Go check out your workspaces, and hide any of the workspaces you are no longer using. You can create new ones based on your current assignment – but remember, you can only have up to 25 files per workspace, so keep it succinct. Once you have it set up, it really helps you save time trying to find files.
Now may also be a good time to go through and delete or name your untitled or orphaned files. Figure out if you need them, and if you don’t, get rid of them! It’ll really help keep your Drive in check.
If you haven’t yet, feel free to check out our Google Drive episode.
Hopefully this episode has helped to give you some tips on how to get (and hopefully stay) organized!
Feel free to share what you do to get yourself organized – we’d love to hear from you. Leave a message on our flipgrid, or leave a comment here on our website.

