[podcast_subscribe id=”7428″]
In this episode, we are talking all about podcasting. We are going to share the process that we use, as well as all of the apps and tools.
If you like what you hear, we would love it if you could share this episode with a colleague or friend. And make sure you subscribe so that you don’t miss out on any new content! And consider supporting the show by buying us a coffee or two!
We would love to hear from you – leave a comment on our website OR check out our FLIP!
Show Notes
This week, we are doing something a little bit different, and are going to talk about our podcasting process and journey a little bit. We often get a lot of questions about how we podcast, how it can be done with students, etc. so we thought we’d take an episode to answer some of these questions.
Podcasting can seem overwhelming when you are just getting into it. There are so many questions and different steps in the process, that we often get questions from colleagues about how doable this is to do with students.
The first thing that we really do need to share is that we knew absolutely NOTHING about podcasting when we first started – so have no fear – if we can do it, so can you!
When we first were getting started, we were so nervous. It was such a frightening process for the two of us, but we found our rhythm.
Looking back now, we have to laugh as we remember the minutes we wasted in nervous giggling. Sometimes it would be a good 10 minutes before we could actually start speaking and recording because of nerves. It resulted in so many bloopers.
Now, over 3 years later, the idea of talking into a microphone is no longer scary, and getting in front of people and talking isn’t as intimidating either. We owe that to our podcasting journey, as this hobby has really been great for developing our public speaking skills and confidence.
The evolution of our podcasting process
When we first started, we were both brand new and had no experience at all with recording audio, etc. so we went with tools that were easily accessible, and that we had somewhat heard about.
Recording Programs
Rachel had a Mac computer, so she started with GarageBand. Katie started on a PC with Audacity.
Audacity wasn’t Katie’s favourite tool. It was very temperamental, and it was a struggle to get it to record the audio properly, though it could have been due to an older version of the program, the PC itself, etc. Either way, it wasn’t her favourite.

GarageBand is great, and it’s free if you’re on a Mac. It will certainly do the job, but it’s designed more for creating music, and not necessarily for recording podcasts. So, it works, but it’s a bit clunky for our purpose, particularly for editing.
Disclaimer: Katie still records her track separately using GarageBand, but only for recording. The editing is done in a different program.
Rachel now records in a program called Hindenberg, which is a fantastic program worth checking out!
Editing Programs
Over the years, we have changed and evolved in our editing process. Rachel takes on the editing, and here are some of the programs that we have used:
- GarageBand
- As mentioned above, it’s a bit clunky for podcasting and the merging of two audio tracks.
- Hindenberg Pro
- This is a paid program, and it’s fantastic! It’s designed for voice, so has more features, plug-ins and add-ins to help make your voice sound good. You can have the program create a profile for each voice that will help clean up the audio and optimize the sound.
- Descript
- This is a paid subscription that we currently use for editing. It creates transcripts, and edits out empty air, and can have it edit out “umms” and “uhhhs” as well.
- It uses AI for editing, significantly decreases editing time, and has
- Zencastr
- Online program that has a video and audio option; we have used this tool in the past when we have guests on the show – allows us to “see” each other while recording the audio
- There are many other programs similar to this one: Riverside FM, SquadCast
Our current editing program, Descript, was a huge win particularly due to the creation of an audio transcript for our listers. We have had some inquiries over the years about access to transcripts or the podcast. Whenever we saw these inquiries we would look for workarounds to try to create one, but there wasn’t an easy workaround that we could find. We attempted to play the podcast audio while doing voice to text, attempted to type out word for word, but it was labour intensive for a hobby, particularly when working full time hours.
The lack of transcript bothered us, so when we came across Descript, it was a perfect fit for the need to cut down on editing time, and it has the transcript feature we really wanted.
Descript has actually just partnered with SquadCast, which is a remote podcasting recording studio. Now you can do remote recording in SquadCast, and then bring it directly into Descript for editing. We haven’t tried this yet, but it’s on our radar and we are hoping to try this out soon! This combo could take an additional 10-15 minutes out of the process, plus there are new features based on AI, so it’s exciting.
One feature of the Descript/SquadCast partnership is the use of AI to remove “ums” – if it doesn’t sound quite right when removing the “umm” there’s a feature where you can split that section and it will regenerate your voice over those couple of words.
Rachel tested this feature in one section of a podcast just to see how it worked, and it was scary how well it worked. There’s a lot of power in this type of feature, and this makes us a little nervous and hesitant. There are many instances of AI being used to create videos and audio of a person saying things that is not actually real – this is a frightening amount of power.
If you want a web-based recording app, there are many out there – Zencastr and SquadCast (as mentioned above), among others. However, we also know people who record in Zoom. You can have multiple people in a Zoom call, and hit record, then take that audio/video and use that!
Our Recording Process
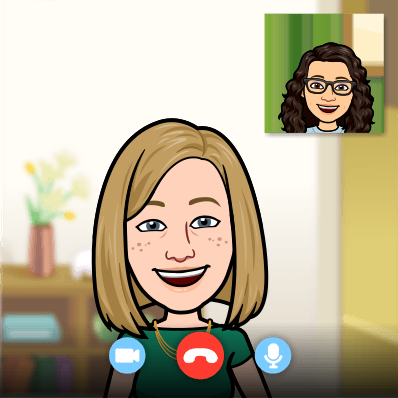
This is one thing that has remained consistent throughout our entire podcast. Because we started recording during covid, we were unable to record in the same location. As such, we use Google Meet as our virtual meeting space, and then we record our audio tracks separately, recording in an end-to-end recording. After hitting record, we do a countdown, and then clap at the same time. Once Rachel takes these audio files into the editing program, she lines them up based on the clap, which is a fairly visible wave in the audio file.
After recording, we save our audio files as .wav files, as they are a higher quality audio file.
Microphones
We always get excited when we talk about microphones. We are extremely happy with our current set up, though it has certainly changed from when we first started.
Rachel started with a dynamic mic – a SamsonQ. She did quite a bit research to determine which mics were good for podcasting, and tried to find one that had a good balance of great reviews and cost. This one was great, and definitely did its job.
When picking out her first mic, Katie first used an Uhuru mic that was pretty affordable. Amazon had such an overwhelming number of options, so she went with one that had pretty good reviews, though not best for podcasting.
It was a condenser mic, and it picked up so much sound so it wasn’t the best for podcasting, particularly in a house with young kids during the pandemic. In order to minimize echo, Katie used a big rubbermaid bin, lined with blankets and pillows, and essentially leaned and recorded into this bin.
Katie upgraded her mic first, mostly because she was tired of the big blue bin and having to hide in there to record. That being said, we are both now using the same mic – a Rode PodMic.
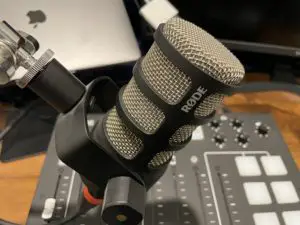
The Rode PodMic is an XLR mic, and requires an audio interface. When Katie first started to use this mic, she used the Rode AI-1, an single channel audio interface that was designed with the PodMic in mind. It lasted for just over a year before she upgraded the interface.
Now, both of us have the same set up: Rode PodMic, a Cloudlifter to boost the sound, and a RodeCasterPro audio interface. It is a powerful set up, and we both love it, though arguably it’s definitely a more high tech set up than needed.
The RodeCaster Pro is an amazing set up that has 4 separate channels for microphones, and you can connect via phone and Bluetooth as well as USB. There are also 8 buttons that are pre-programmed with laugh tracks, intro and outro music, applause, etc. You can also re-program to put in your own sounds. It’s a really powerful board, with some awesome features.
Please know that this set up is not necessary. If you are just starting out, there are so many options to consider. For intro/outro music, there are websites that list royalty-free music you can use, and there are so many good quality mics available that are affordable. Anything that is USB and dynamic is a great place to start, and you’re going to be pretty happy with it!
Getting it published . . .
Now that we have covered the process of equipment and getting our episodes recorded and edited, it’s worth mentioning the steps we take to getting it published every week.
In terms of hosting our podcast, we use a site called Buzzsprout. Once we have recorded and edited our episode, we upload it to this hosting program and release it to the world from there.
There are a range of plans available in Buzzsprout; while there is a free account, it’s minimal in terms of time max per month and storage, and episodes are only hosted for 90 days. We do have a paid subscription, but we have the cheapest plan and it is perfect for us. It’s also easy to navigate, and right from Buzzsprout, you can get your podcast pushed out to various apps where people can access your content.
Buzzsprout also has monetization options once you reach a certain number of downloads. You can have ads added to your podcast, which we don’t use, and you can also have ads on your website. We have opted for that option, and it does help us cover some of our monthly costs.
This program also has some neat editing tools that sound really interesting. They have magic mastering, which can make your audio all sound consistent, and they have co-host AI, which uses AI to come up with the other stuff that comes with a podcast (episode notes, etc.), though we haven’t tried these yet.
Please note that there are lots of websites and programs that offer similar hosting and editing features. One that we know of is Anchor, which you can use to upload your podcast for free, and host them for free. You just need to do some research to figure out which one works best for you and your purpose/audience.
Once our episode is uploaded in Buzzsprout, there are some other pieces that we have for each episode:
- Social Media posts
- Newsletter
- Blog Post (you’re reading it right now!) aka “Shnotes” using WordPress
- Visuals, and other small bits and pieces
We have also started to use ChatGPT to help us brainstorm episode titles and social media captions. We found that after around 50 episodes, it became challenging to come up with titles that stood out or were different enough from other titles. We tend to have phrases and expressions that we use more often just based on our lived experience and our teaching experiences. ChatGPT has really helped us to change it up, and it takes the pressure off of trying to be creative and different.
Our blog, which Katie’s family affectionately termed “Shnotes” (short for show notes) is hosted on WordPress. We try to create detailed notes with links to resources, articles, etc. in case people prefer a written version, versus a podcast. WordPress does have a cost as well, but there are lots of other options out there that are free.
Have more questions about podcasting? Want to learn more? Let us know!

